React is a great choice for writing test first client side Javascript. The test ecosystem is mature enough to enable test first development of complex components. This article describes the process of test first React and introduces supporting test libraries Jest and Enzyme. In the next article we’ll look at more advanced testing including API testing and module mocking.
All code examples in this article are in GitHub. I’ll reference specific commits throughout so you can follow along.
Getting Started
React offers good support for newbies creating their first test first React project. In particular, the Create React App will set up a functioning React Single Page Application configured with sensible defaults. Even better, it’s packaged with a simple toolchain to support testing that covers running, testing and live-editing.
As a prerequisite, you’ll need to install an up to date version of Node.js and npm. The latest LTS (long term support) release of Node.js can be downloaded from https://nodejs.org/en/. It includes npm so no need to install that separately.
Once that’s installed, run the create-react-app package from command line:
npx create-react-app react-registration
Or, you can run this direct from WebStorm (File / New / Project… / React App):
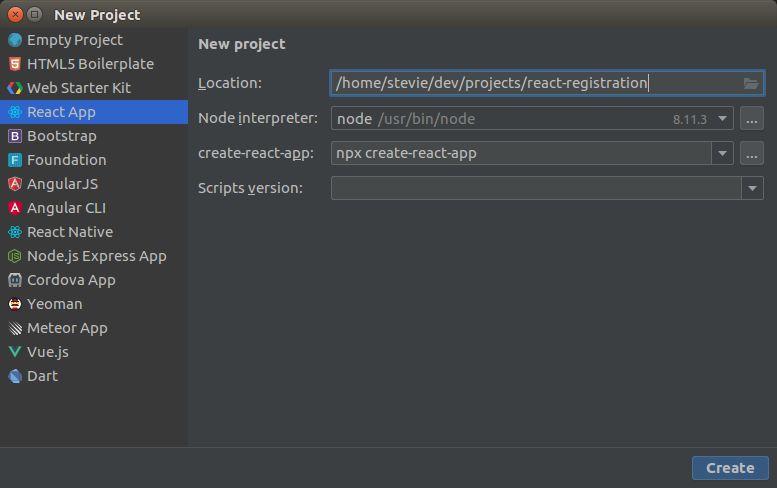
In this example project, I’ll build a user registration component so I’ve called my project react-registration.
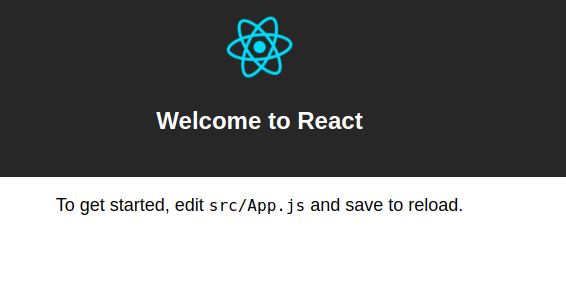
To see the application running run
npm start
The application should start up and display itself in your default browser.
Setup Enzyme
The create-react-app package includes most dependencies you’ll need to get started including the Jest test runner. However, it does not include the Enzyme test utilities. Enzyme renders React components in a headless browser allowing more powerful tests than simply executing JavaScript with Jest.
To use Enzyme, first install Enzyme and its React adapter via npm:
npm install --save enzyme enzyme-adapter-react-16 react-test-renderer
Then create a setupTests.js file in src containing the following:
import { configure } from 'enzyme';
import Adapter from 'enzyme-adapter-react-16';

configure({ adapter: new Adapter() });
Test First React example: A new component
Enough setup. Let’s get coding!
First, let’s create the simplest possible component following a test first React process. Here’s the simplest possible test that just verifies a component is rendered:
import React from 'react';
import { shallow } from 'enzyme';
import {UserRegistration} from "./UserRegistration";

describe ('<UserRegistration/>', () => {
    it('renders', () => {
        const wrapper = shallow(<UserRegistration />);
        expect(wrapper).toBeDefined();
    });
});
And to make the test pass, here’s the simplest possible component:
import React, { Component } from 'react';

export class UserRegistration extends Component {
    render() {
        return (
            <div>TODO</div>
        );
    }
}
You can run the tests from command line with
npm test
but I really like the test runner that comes with WebStorm. Just right click the test file and click Run…
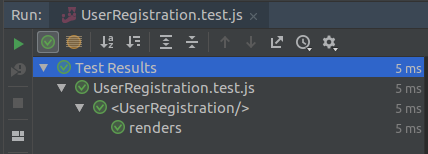
The test passes so we should be good to add the new component to our App.js. React components can be invoked using HTML-style syntax. So to add our UserRegistration component to the App.js, just add a <UserRegistration/> tag. Don’t forget to import the component.
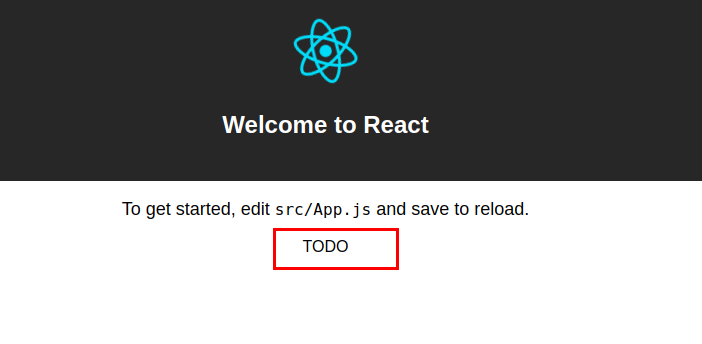
If you’re following along, your code should look like this and your app should look like this:
Specify the component behaviour
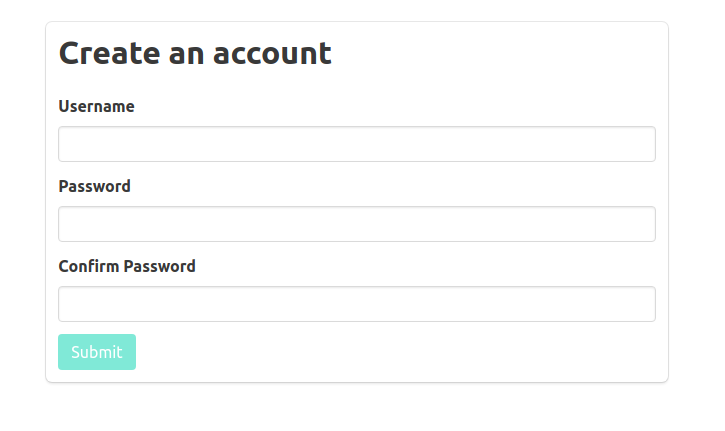
Now that we’ve got a ‘hello world’ component, we can add functionality to it. We want a user registration component that asks for a username, password and password confirmation. If the confirmation does not match the password it is rejected. When a valid form is submitted, the username and password are passed back to the calling component. It will look like this:
In Jest (and Jasmine and Mocha), each test behaviour is defined in a function called ‘it’, optionally grouped into ‘describe’ blocks. The ‘it’ label guides us towards a naming convention for tests. We want one test for each expected behaviour so our tests will be:
- (it) notifies caller of username and password
- (it) disables submit when a password does not match confirmation
- (it) enables submit when password matches confirmation
plus an additional implicit behaviour:
- (it) disables submit when password and confirmation are blank
Take a look at the tests defining these behaviours. To illustrate, here is the test that the submit button is enabled:
it('enables submit when password matches confirmation', () => {
    const wrapper = shallow(<UserRegistration onSubmit={onSubmit}/>);
    setFieldValues(wrapper, username, password, password);

    const submitButton = wrapper.find('button');
    expect(submitButton.prop('disabled')).toBe(false);

    submitButton.simulate('click');
    expect(onSubmit).toBeCalled();
});
Following the test first React process, we can now create a component that satisfies the tests.
The three rules of React
React is a very simple framework. While there is much to master, you can understand the foundations of it with three rules:
- Pass values into components as component props. Access them with this.props.
- Values cannot be passed out of components directly. Instead, pass callback functions into components to receive notifications.
- Never update component state directly. Always use this.setState().
With those rules in mind, let’s build the component.
Building the component
First, initialize the state in the constructor. This component needs to know the value of the three input fields. We also need to track whether or not the submit button is active:
constructor(props) {
    super(props);
    this.state = {
        username: '',
        password: '',
        confirm: '',
        submitEnabled: false
    };
}
Then render the component as HTML, setting the initial values from props / state as required. In this case the three inputs are blank to start with so we only need to initialize the submit button.
render() {
    return (
        <div>
            <h1 className="title">Create an account</h1>
            <div className="field">
                <label className="label">Username</label>
                <div className="control">
                    <input name="username" type="text" className="input username" onChange={this.handleInputChange}/>
                </div>
            </div>
            <div className="field">
                <label className="label">Password</label>
                <div className="control">
                    <input name="password" type="password" className="input password" onChange={this.handleInputChange}/>
                </div>
            </div>
            <div className="field">
                <label className="label">Confirm Password</label>
                <div className="control">
                    <input name="confirm" type="password" className="input confirm" onChange={this.handleInputChange}/>
                </div>
            </div>
            <button className="button is-primary" onClick={this.handleSubmit} disabled={!this.state.submitEnabled}>Submit</button>
        </div>
    );
}
Finally, create handlers for onChange / onClick actions. These are used to keep React’s state consistent with the state of each of the component’s fields.
handleInputChange = (event) =>  {
    const target = event.target;

    // Logic to check passwords match must check input change against existing field value.
    let submitEnabled = false;
    if (target.name === 'password') {
        submitEnabled = target.value && (target.value === this.state.confirm);
    } else if (target.name === 'confirm') {
        submitEnabled = target.value && (target.value === this.state.password);
    }

    this.setState({
        [target.name]: target.value,
        submitEnabled: submitEnabled
    });
};

handleSubmit = () => {
    if (this.state.submitEnabled) {
        this.props.onSubmit(this.state.username, this.state.password);
    } else {
        console.error("Attempt to submit form when form has validation errors");
    }
};
Typically, a handleInputChange function would be a simple one-line call to this.setState(). In this case though, I’ve added extra logic so that it handles input from any input field. It uses the field’s name attribute to determine which state variable to update. It also handles the submitEnabled state.
See the finished component.
API calls and mocking
Any application that’s more than a toy example like this will call back end APIs (usually using HTTP / Rest) and will built upon modules and libraries. We’ll look at how to apply test first React principles to API calls and module dependencies in the next article.
[…] « Test First React part 1: setup and first tests […]