The Microsoft Bot Framework is a flexible framework for building conversational bots. A bot can be written once and deployed to multiple channels including webchat, Microsoft Teams, Alexa and SMS. It supports text, speech and rich GUIs with images and controls.
In this three part series, I’ll register a ‘hello world’ bot application as an Azure Bot Resource and then look at how to customise my bot behaviours. Finally I’ll make it available to a chat widget on a web page, SMS and consume it from a Node.js application.
In the first part, we created an Azure Bot registration and connected to a demo bot application. In this part we’ll swap out the demo bot for one we’ve built using the Microsoft Bot Framework SDK.
Create the bot
There are a couple of ways to create a bot. There’s the Bot Framework Composer – a drag and drop UI that lets you build bot logic using a graphical flowchart style. It has built in tools for local testing and deployment to Azure. I’m comfortable with code though so I’ll use the Bot Framework SDK directly.
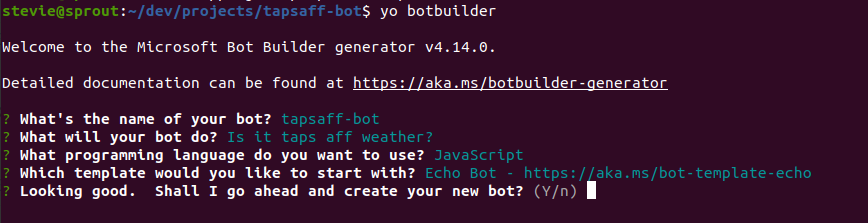
Your options are C#, Java, JavaScript and Python. I’ve picked JavaScript for my bot. There’s a yeoman template to get us going quickly.
npm install -g npm
npm install -g yo
npm install -g generator-botbuilder
yo botbuilder
There are a couple of config options we need to set to get this working. Set the MicrosoftAppId and the MicrosoftAppPassword in the .env file (see the previous article for where to get these). Then start the application with npm start.
Use ngrok to make this available on the internet:
ngrok http 3978
and then paste the ngrok URL into the Configuration blade of the Azure Bot registration from the previous article. You can use the Test in Web Chat blade to check it works.
Use the Bot Framework SDK to build behaviours
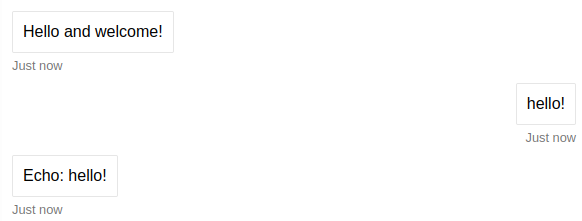
We’ve created an instance of the Echo Bot template. We now want to build our own behaviours into the bot. I’d like to build a bot that tells you if it’s taps aff weather.
Open up the generated application in WebStorm or your favourite IDE. There are only two .js files here. index.js starts a NodeJS server, registers a BotFrameworkAdapter and listens for requests on /api/messages. This is framework level stuff and there’s nothing we want to modify here.
bot.js creates a subclass of ActivityHandler and implements a couple of methods. onMembersAdded listens for new members added to the conversation and sends a welcome message. onMessage listens for new messages in the chat and responds with an echo. These are the two methods we want to override.
For the tapsaff-bot I want to make HTTP GET requests to the tapsaff API:
tapsAffStatus: (city) => {
    return fetch('https://taps-aff.co.uk/api/' + city)
        .then(response => response.json())
        .then(data => data.taps.status);
}
I’ll call this from onMessage and return the response as my bot response message:
this.onMessage(async (context, next) => {
    const city = context.activity.text;
    let replyText = 'Never heard of it. What city are you in?';
    try {
        replyText = await tapsAffStatus(city)
            .then(response => `It's taps ${ response } in ${ city }`)
            .catch(error => {
                console.log(error.message);
                return replyText;
            });
    } catch (e) {
        console.log(e.message);
    }
    await context.sendActivity(MessageFactory.text(replyText, replyText));
    await next();
});
For onMembersAdded, I simply want to change the welcome message:
this.onMembersAdded(async (context, next) => {
const membersAdded = context.activity.membersAdded;
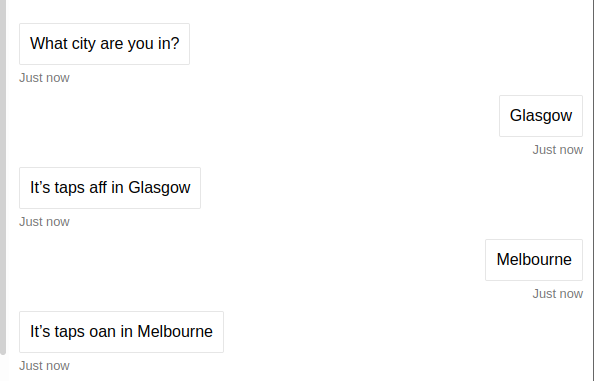
const welcomeText = 'What city are you in?';
for (let cnt = 0; cnt < membersAdded.length; ++cnt) {
if (membersAdded[cnt].id !== context.activity.recipient.id) {
await context.sendActivity(MessageFactory.text(welcomeText, welcomeText));
}
}
// By calling next() you ensure that the next BotHandler is run.
await next();
});
Assuming that ngrok is still up, we can npm start it and try it out:
Create an App Service in Azure
Running the application from a laptop using ngrok is fine for testing. Once we’re happy it works as expected, we want to deploy to Azure. I’ve chosen Azure only because it keeps all the application management in one place – Bot Framework is Microsoft so must be deployed to Azure. However, the back end is just an ordinary web app here so we could use AWS, Google Cloud or self host.
In the Azure console, I selected App Services and clicked Create New App. Then enter project details. You can deploy as a Docker container but I’ve chosen a simple deploy to the Node 14 Runtime stack. I’ve chosen to deploy to the same region as the Bot registration and I’ve picked a free tier service plan.
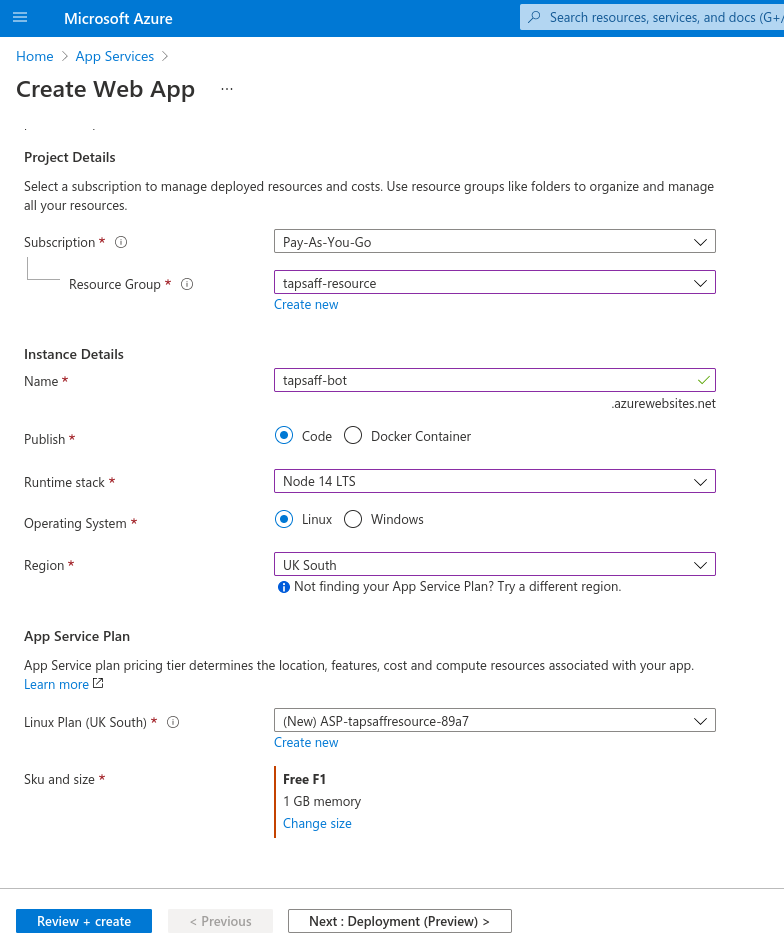
Then click through the remaining screens and click Create.
Deploy the app
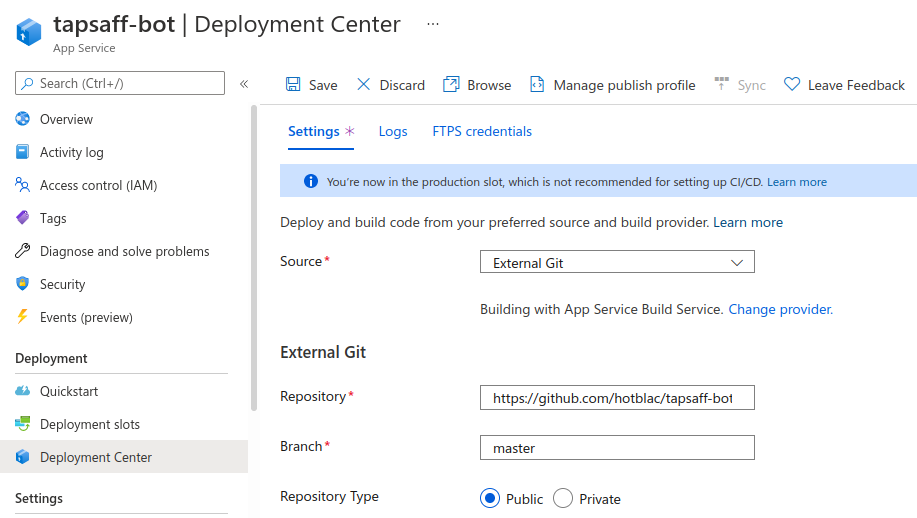
There are a number of ways to install the code into this Azure App Service. One way is with the Azure App Service extension for Visual Studio Code. Another is with a CI/CD pipeline in GitHub. Or you can do a simple FTP upload. I don’t need the full CI/CD pipeline but my code does live in GitHub so I’ve chosen the simple External Git (manual deployment). Regardless of the method you choose, the options you need are in the Deployment Center blade.
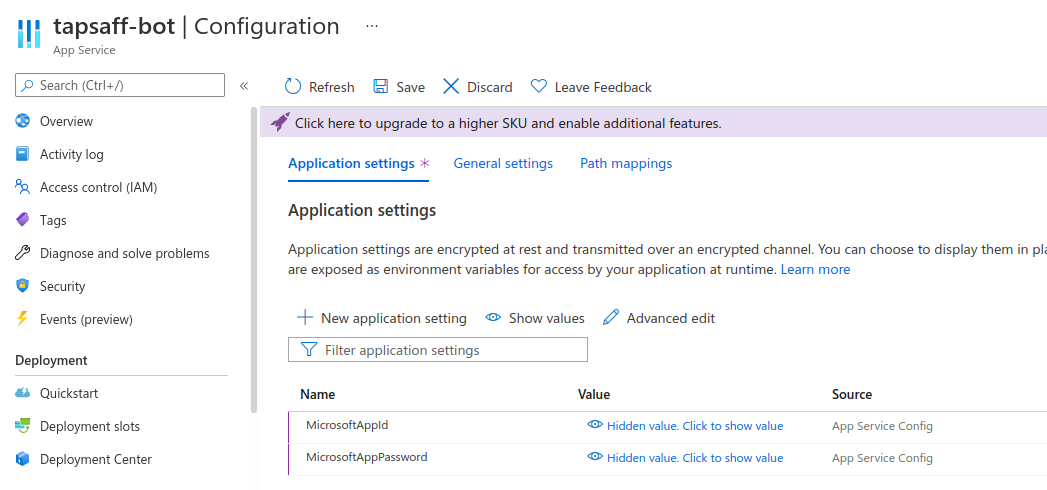
We’ll also need to configure our application environment variables (MicrosoftAppId and MicrosoftAppPassword) in the Application Settings blade.
Finally, go back to the Bot configuration and update the URL to point at this new Azure App Service.
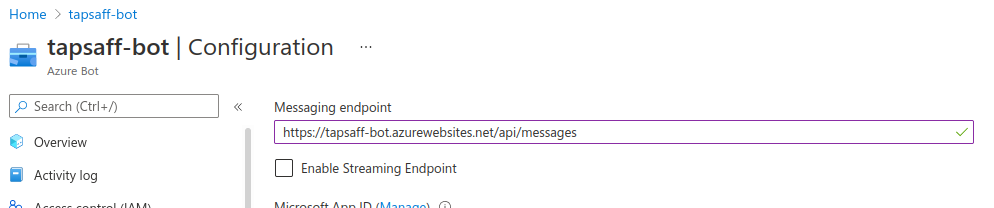
Again, use the Test in Web Chat blade to check everything works.
Next up
We’ve now created a bot using the Microsoft Bot Framework SDK and deployed it to Azure. The application code for this example is in GitHub.
In the final part of this series, we’ll look at how we can consume it using some of the channels provided by the Bot Framework. We’ll present it as a chat widget on a webpage as an SMS text service and inside of a custom application.
[…] « Exception handling in ScheduledExecutorService Microsoft Bot Framework 2: Build a bot with Bot Framework SDK » […]